Followers

Monday, August 12, 2013

Nail Art Remake: Ice Cream and Candy Nails & Tutorial

Hello dear readers!

This time I decided to do an improved version of a nail art from last year (see it here).

The nail art you see now was what I had in mind originally, but 1yr. ago, I was either too busy or too lazy to do all the steps...
(↓ Tutorial for this nail art below ↓)

1.Once your nails are prepped with a basecoat, start by applying 1 or 2 layers of white nail polish. 
This is only the base for the pastel colors to look nice & bright.
 

2. Apply lines or dots of different pastel colors onto waxed paper, plastic or aluminum foil.

3.Using a nail stamper press it on top of the nail colors, twisting slightly so that the colors mix up a little bit. You will see the colors transferring to the stamper and ready to apply on your nails.
*You can also paint the pastel color lines directly on your nails with your nail polish brush, whichever is easier for you.

4. Stamp the colors from the stamper onto each nail.(Or paint each color with a nail polish brush). Let it dry.
Don't worry if it doesn't look perfect, it doesn't have to be ;)
My nails look like Easter eggs :D
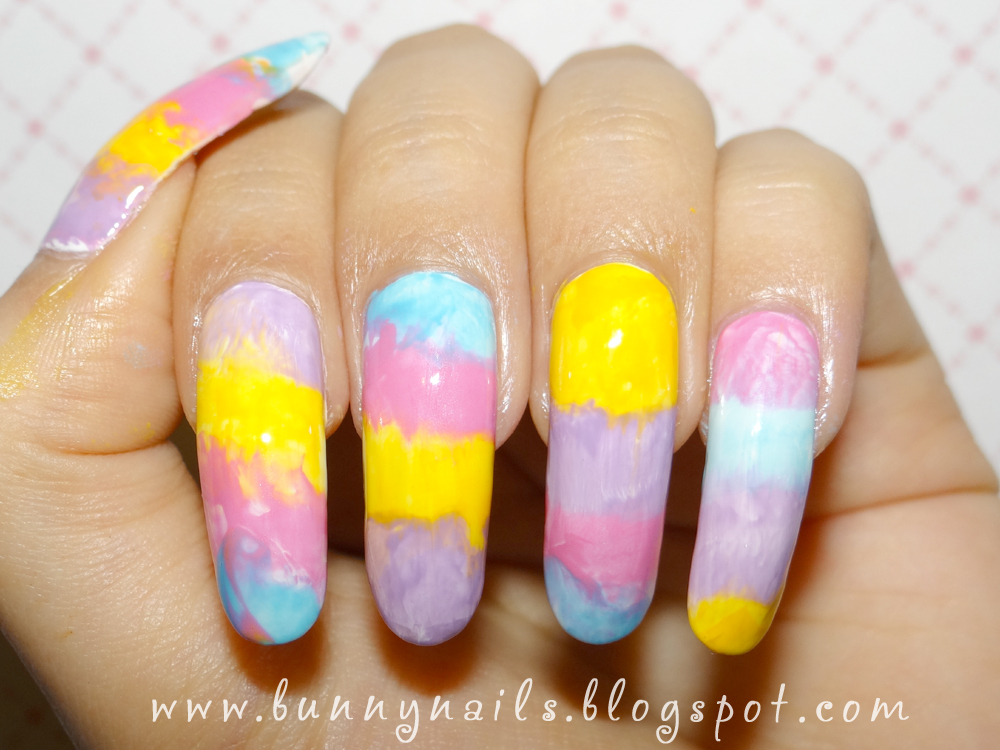
5. Apply one coat of white crackle nail polish and let it dry to get the cracking effect. Apply clear topcoat to smooth out the nail surface and let dry.

6. I used Konad's Q1 stamping plate and stamped the candy designs on my nails using Kleancolor black. You can use any other stamp plate design of your choice.
*There are other options for this nail art such as applying nail art stickers or by drawing freehand designs on your nails ;)

I hope you like this nail art tutorial and that it can be useful to you ;)


Which version do you like better? Last year's or this one?
♥♥Thank you so much for reading♥♥

Thursday, August 1, 2013

Beauty Berry - Thermal Nail Polish by Cameo Colours Lacquers

Hello dear readers!

I want to show you some swatches from Beauty Berry a thermal nail polish by Cameo Colours Lacquers. It is part of its thermolinear collection which means it changes colors with temperature and also has a linear holographic effect. (Click here to see swatches of another thermolinear color I posted previously).


Here you can see the beauty of this nail polish at regular temperature.

When cold, the nail polish turns completely purple.

Then, it turns pink with warm temperature.

Overall, this nail polish applies nicely and is pigmented. I'm very happy with the quality this brand offers. Holographic and thermal are two types of nail polish that I love and this is such a perfect combination.
For info on where to buy this nail polish you can go to Cameo Colours FB

 *This nail polish was purchased by me. The opinion expressed of this product is solely my own.

Do you like this thermal color combo?
♥♥Thank you for reading♥♥

Tuesday, July 30, 2013

My 1st Attemp at Water Marble Nail Art

Hello dear readers!

Today, I'm excited to show you my first attempt at water marbling :) I know I'm years too late to try this trend. In my case, this was not as easy as it seems... you have to choose the right nail polishes otherwise, you'll end up with a blob of polish on the bottom of the cup of water... it happened to to me before :'( and for this reason, I thought trying more would be a waste of time and precious nail polish.

I have to admit that I love to watch water marble YouTube videos (I find them relaxing for some strange reason). The whole process is fascinating and the end results amazing. I know this manicure is not spectacular as many other water marbles out there... but, bear with me... it's only my 1st attempt ;)

For this manicure, I used three China Glaze nail polishes from the Avant Garden collection: Passion for Petals, Fancy Pants and Dandy Lyin' Around. The base of this manicure is Passion for Petals as well. I found that most China Glaze nail polishes are good for water marbling.


As you can see, the swirls of nail polish are not as much. This is because I was experimenting and I just added a few drops of each color in case I failed... but in the end, I really like the randomness of the lines.
Have you tried water marbling? What do you think of my first attempt?
♥♥Thank you so much for reading♥♥

Thursday, July 25, 2013

Black Lace and French Manicure and How to

Hello dear readers:

The nail art I'm posting today is a remake of something I already did once before I started this nail blog. It is a combination of French manicure and lace. Details on how I did it below:


I started with one layer of basecoat. Using Kleancolor in black, I painted French tips using the nail polish brush. I didn't use adhesive guides this time. I think it looks better if I use my natural nail smile lines as my guide.

I stamped on top of the nail bed area with a lace pattern from A40 stamping plate using Kleancolor black as the stamping polish. I wanted to give this manicure a bit more glam so I added one layer of a glitter nail polish on top of the French tip.

What do you think of the combination of lace and French manicure?

♥♥Thank you so much for reading♥♥

Thursday, July 18, 2013

Holographic Skittle Manicure and Stamping

Hello dear readers!

This is my first post after my painful thumbnail breakage... as you can see, I managed to keep some length.

It's been months since I purchased my Color Club Halo Hues collection and still they were sitting unused in a dark corner of my nail polish drawer. This time I thought it was a good idea to put 5 of them to good use and do a skittle manicure.
 

The Color Club colors that I used are as pictured on the pic below from left to right:
 Cosmic Fate, Over the Moon, Kismet, Eternal Beauty, and Angel Kiss

I stamped a pattern from my Bunny Nails HD-A plate using Kleancolor black.

Both of my hands, can you believe I took this pic myself? :-)

What do you think of my attempt on the skittle manicure?
♥♥Thank you so much for reading♥♥
Related Posts Plugin for WordPress, Blogger...