Followers

Showing posts with label nail stamp. Show all posts

Sunday, November 2, 2014

Nail Art for Día de muertos - Day of the Dead

Hello dear readers!

This is the 3rd year that I get to do a manicure based on Día de muertos.

If you don't know what this Mexican festivity is about, you can read my two previous posts (here and here).

What I usually do is remember my loved ones who have passed away. Well, they are always in my heart and mind, but for Mexicans, November 1st and 2nd is a special day. We dedicate this day to go to the cemetery and visit our relatives tombs, put flowers and their favorite food. We stay a while there, and talk with our family while we remember special moments of those who have gone before us. This is what I mostly remember of día de muertos in Mexico. What I just described is another way of celebrating this day besides the traditional altar de muertos.


As for this nail art, it always takes me hours to put it together. From planing the layout of all the día de muertos elements into nail art, to painting the base color, choosing all the colors that will be used, stamping, etc... 4-5 hours at least. I just like to put a lot of thought and heart into it, as if it was my own altar.

 Here you can see many elements surrounding this tradition. Two skeletons in such "alive expressions" that symbolizes death as part of life itself and a reflection of ourselves. Cómo me ves te verás (The way you see me now, you will look like). The two nails in the middle represent my memories of going to the cemetery to leave my grandfather food and lighting a candle so it would guide his spirit to us. In our minds, he would know we were lighting that candle for him, he would see us and enjoy his food as well. *As a curious note, all people who make food offerings say that after this day, altar food loses its flavor, meaning that it was somehow consumed by our loved one.
Whether these beliefs are truth or not, for me, it is a beautiful, magical tradition that I grew up with.

The thumb design is just a representation of papel picado (cut out paper) that adorns altars and many other Mexican celebrations.


I hope you liked this nail art and learned a bit more about this Mexican holiday.
Día de muertos is more than painting your face as a sugar skull. I hope this day never loses its true meaning which is: honoring and remembering our lost loved ones...gone but never forgotten♥

♥♥Thank you for reading♥♥


Friday, October 31, 2014

Ghosts Pumpkins and Bats for Halloween

Hello dear readers!

One more Halloween manicure...


More details and pics below.

For this nail art, I started by applying Barielle - Berry Posh. This nail polish is part of the Me Couture collection.

I painted the tip of my thumb and middle finger with Bonita - Cocktails and Carving.Then, I stamped Ghosts, bats, pumpkins and vines from HD-C and HD-D plates.


This post was very quick, I'm trying to post a couple more manicures by this Halloween. 

♥♥Thank you for reading♥♥

Wednesday, October 29, 2014

Halloween Holographic Spiderwebs

Hello dear readers!

Here's my 2nd Halloween-inspired nail art.

This time, it's all about the spiders...


I started by wearing 2 coats of Barielle Taupe Notch, part of their Me Couture collection

Then, I stamped spiderweb and spider designs from Bunny Nails HD-C plate.
I used Color Club Harp on It for the holographic effect and Nabi metallic black for the spiders.

Cute little spiders crawling on my nails...just for Halloween


I hope this served you for some inspiration to make your own manicure this Halloween that's just around the corner ;)

Friday, September 12, 2014

Cute Forest Animals Nail Art + Review - Born Pretty Store Water Decals

Hello dear readers!

Today I'm posting a manicure I had on a few weeks ago...

This is my second time trying water decals for Born Pretty Store and this is the result. I will add more details on what I did for this manicure, so keep reading ;)


I started with 2 coats of OPI Glints of Glinda as my base.

To add some dimension to the nail art, I stamped random dots pattern using various pastel colors from the Sally Hansen Insta-dri line. They work beautifully for stamping ;)

Now starts the fun part, using the decals.
You can find these decals at Born Pretty Store through this link.
*Don't forget to use my 10% off coupon code: FDB10

I cut all the designs that I found cute for my manicure...

Put the cut out design on tap water for 15 secs.

Take it out, blot some of the water and slide the decal, proceed to put it on your nail.

I find that putting the decals on top of a nail polish base that's slightly fresh, yet dry to the touch, makes it easier to apply. Apply all the designs and arrange them to your liking. After that, use clear topcoat to protect your nail art.

I really liked these decals as they have lots of designs for long nails like mine. Or if you have short nails, then you'll have lots of decals that will last for many manicures ;) They are fun and easy to use.
*This product was sent for me for review purposes.

What do you think of this nail art? 
I think the designs look like cute animals out of a children's book.

Monday, September 8, 2014

OPI - The Sky's my Limit

Hello dear readers!

I'm back with swatches of OPI - The Sky's the Limit. This nail polish is part of OPI's collaboration with Ford Mustang which celebrates its 50th anniversary.
(I wont comment more on that because I am pretty much clueless about cars, etc...I wish I was, but I'm not -_-).

This is the only shade that I picked from this collection because honestly, it was the only one that caught my attention. It is sparkly and the color finish is very interesting...I'll elaborate more on that below...


The Sky's my Limit is a shimmery blue with metallic finish. It also has a fine gold and green shimmer that shows at certain light but not easy to capture in photograph.

Now, here's the gold/green shimmer I was talking about.
It gives this nail polish such a summer, beach-y flair to it...

...and this is why I stamped some scales to it, reminds me of a mermaid's tail.

Did you  like OPI Mustang collection? Which one did you choose/ would have picked?

♥♥Thank you so much for reading♥♥

Thursday, July 24, 2014

Twin Nails with Stamping Queen: Leadlight & Floral

Hello dear readers!

Last weekend, my fellow nail blogger, Stamping Queen and I planned a twin manicure which would feature the now famous technique among nail stampers: Leadlight. I must say this is the 1st time I was going to try it and I was not sure how it was going to come out.

Here is what we did....More pics and details below ;)


I used Ulta - Snow White as the base for this manicure

Mariana from Stamping Queen blog suggested me that we used Cheeky plate CH44. At first she said we used the upper floral pattern but I told her that I liked the pattern below it. My nails are longer as you see, and the design I used was better for double-stamping without the design looking chopped off.

Now comes the fun part... for the leadlight technique you have to use jelly finish colors and paint on top of the stamped designs. OPI Tints or Mia Secret tints are perfect  for it. In my case, I used a mix of colors from the Mia Secret tints to make pink, purple, blue and yellow. You can use a dotting tool for more accuracy when applying the colors.

After you apply the tints, let dry a bit and add a coat of fast dry topcoat.

Muchísimas gracias Mariana, me divertí mucho haciendo este nail art contigo. Aunque estemos a muchos kilómetros de distancia, fue muy lindo que hayamos podido colaborar en esta manicura ;)
Thank you so much Mariana, I had so much fun doing this nail art with you. We are miles and miles apart but still it's nice we could still do this collaboration ;)

*Visit Stamping Queen blog here or follow her Instagram account @Stampingqueenblog
It is mostly in Spanish but nail art works don't need translation ;)

What do you think of this nail art?

♥♥Thank you for reading♥♥


Monday, July 21, 2014

Henna Tattoo Inspired Nail Art

Hello dear readers!

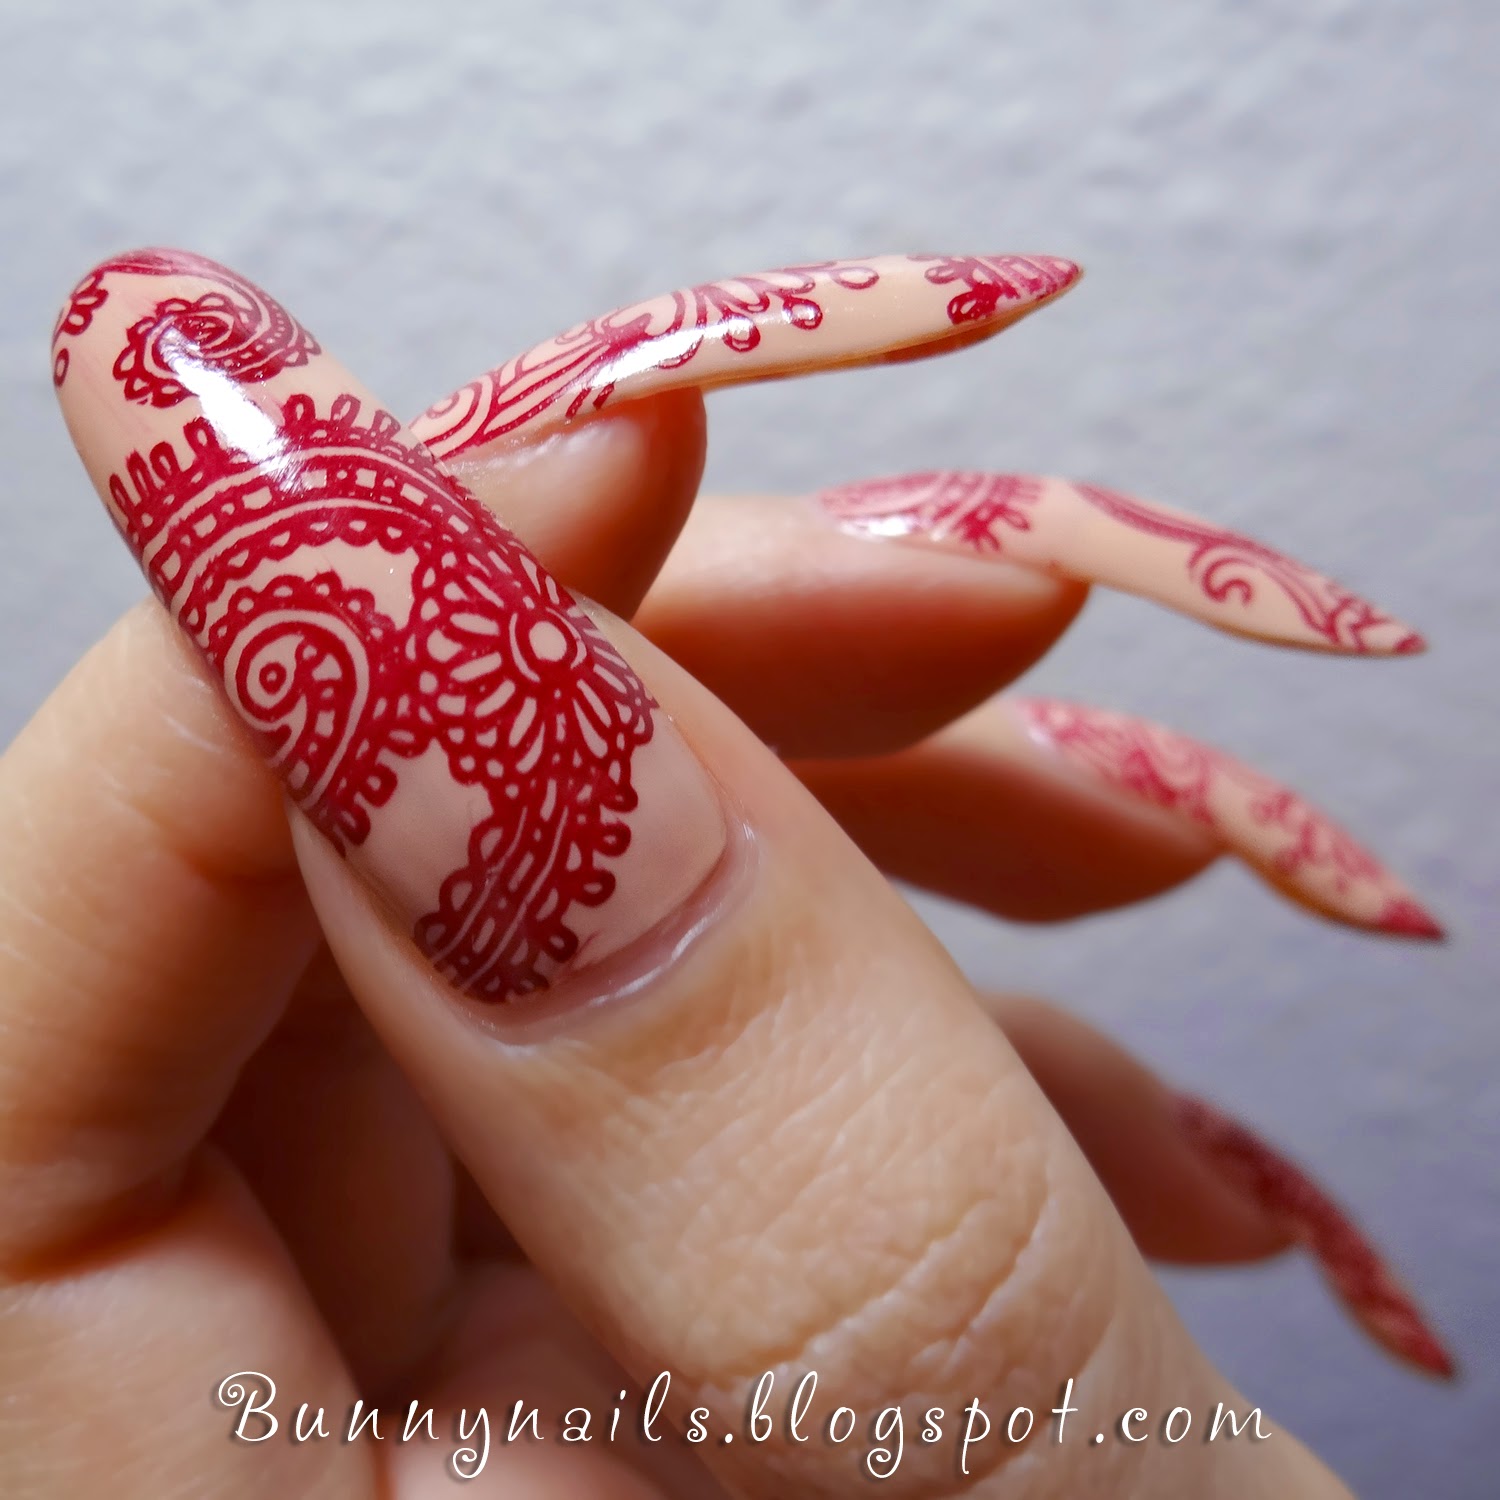
Today I have a nail art inspired on henna tattoo designs.

I've seen many pictures on henna designs done on Indian women for weddings. I think it is such beautiful and intricate work which is done by hand...I am left in awe every time I see those works of art.

Here's my stamping inspired on those designs...

I started by applying a nude tone nail polish by The Face Shop.

Then, I stamped designs from my BuNa B plate.
I used Sally Hansen Insta-dri - Cinna-Snap as the stamping polish.

I think I should have used a color that was more brown, but anyway...

What do you think of this nail art?

♥♥Thank you for reading♥♥

Monday, July 7, 2014

USA Nail Art, 4th of July

Hello dear readers!

If you live in the USA, I hope you had a nice 4th of July.

I didn't have time to do a proper post about a 4th of July inspired nail art, but here is what I posted on Instagram:

I stamped using Essie - There's no place like Chrome over my red,white, blue base.
I used Bunny Nails holiday plate HD-A for the stars and lines.

In this case, I used Holographic silver, red and blue
-Harp on It by Color Club (silver)
-Vermelho Surreal by Jade (red)
-Summer Stagazing by ILNP (blue)

Very simple but appropriate for the occasion.

♥Thank you for reading♥


Friday, June 27, 2014

Bird Stamping + Cult Nails - Baker

Hello dear readers!

I am trying to post more often to motivate myself use more of my polishes and nail art, if possible.

This time I'm going to show you some bird stamping... this is a pattern that I like a lot because it looks like woodblock print. I've seen it on my customers' manicures, but this is the first time I get to try it on my nails.

(Pictures can be enlarged)

I started by applying 2 coats of Cult Nails - Baker as the base for this nail art
 

For an extra touch to the background of my stamping, I added a layer of gold flake topcoat.

Sorry for such a bad angle picture, but here you can see the stamping in more detail.
I used BuNa A plate and used Nabi in black to stamp the design.


I hope you like this manicure... on my next post, I will be trying water decal nail art ;)

♥♥Thank you for reading♥♥

Tuesday, June 24, 2014

ILNP Cutie Pop and BuNa B Floral

Hello dear readers!

Here's my manicure featuring shorter nails after a long, long time...

(All pictures can be enlarged)

 For this nail art I used ILNP in Cutie Pop which is a bubblegum pink with a holo finish

Using Nabi in black as my stamping polish, I stamped a floral design from BuNa B plate.

Extra pic...

This manicure was very simple because I just wanted to give an extra touch to an already cute color by ILNP.

♥♥Thank you for reading♥♥

Monday, June 2, 2014

Nail Art/Swatches Compilation

Hello dear readers!

It's good to be back to blogging once again.
This time, instead of posting long overdue swatches and nail art one after another, I decided to post all here.

Scroll down to see more pictures and a brief description of each.

First, I start with swatches of Lacquer Lust - Amor which is a thermal with that turns pastel pink when cold and white when warm. It also has a mix of iridescent hexagonal glitter and metallic pink glitter. Very opaque and easy to apply.
 
Here you can see the thermal effect at its best.


Next is OPI - Love angel music baby from the Gwen Stefani collection. It is a gold that dries to a satin finish, but in this case, I added topcoat for shine.


I used this nail color as the base for water marbling. You can see a short video on my Instagram, here.

Here, I did some lace design stamping. I used OPI - French quarter for your thoughts as the base and stamped with Khroma Beauty - Dahlia. For the accent nail, I stamped with the OPI color over the Dahlia base. I used a lace design from my BuNa A plate.


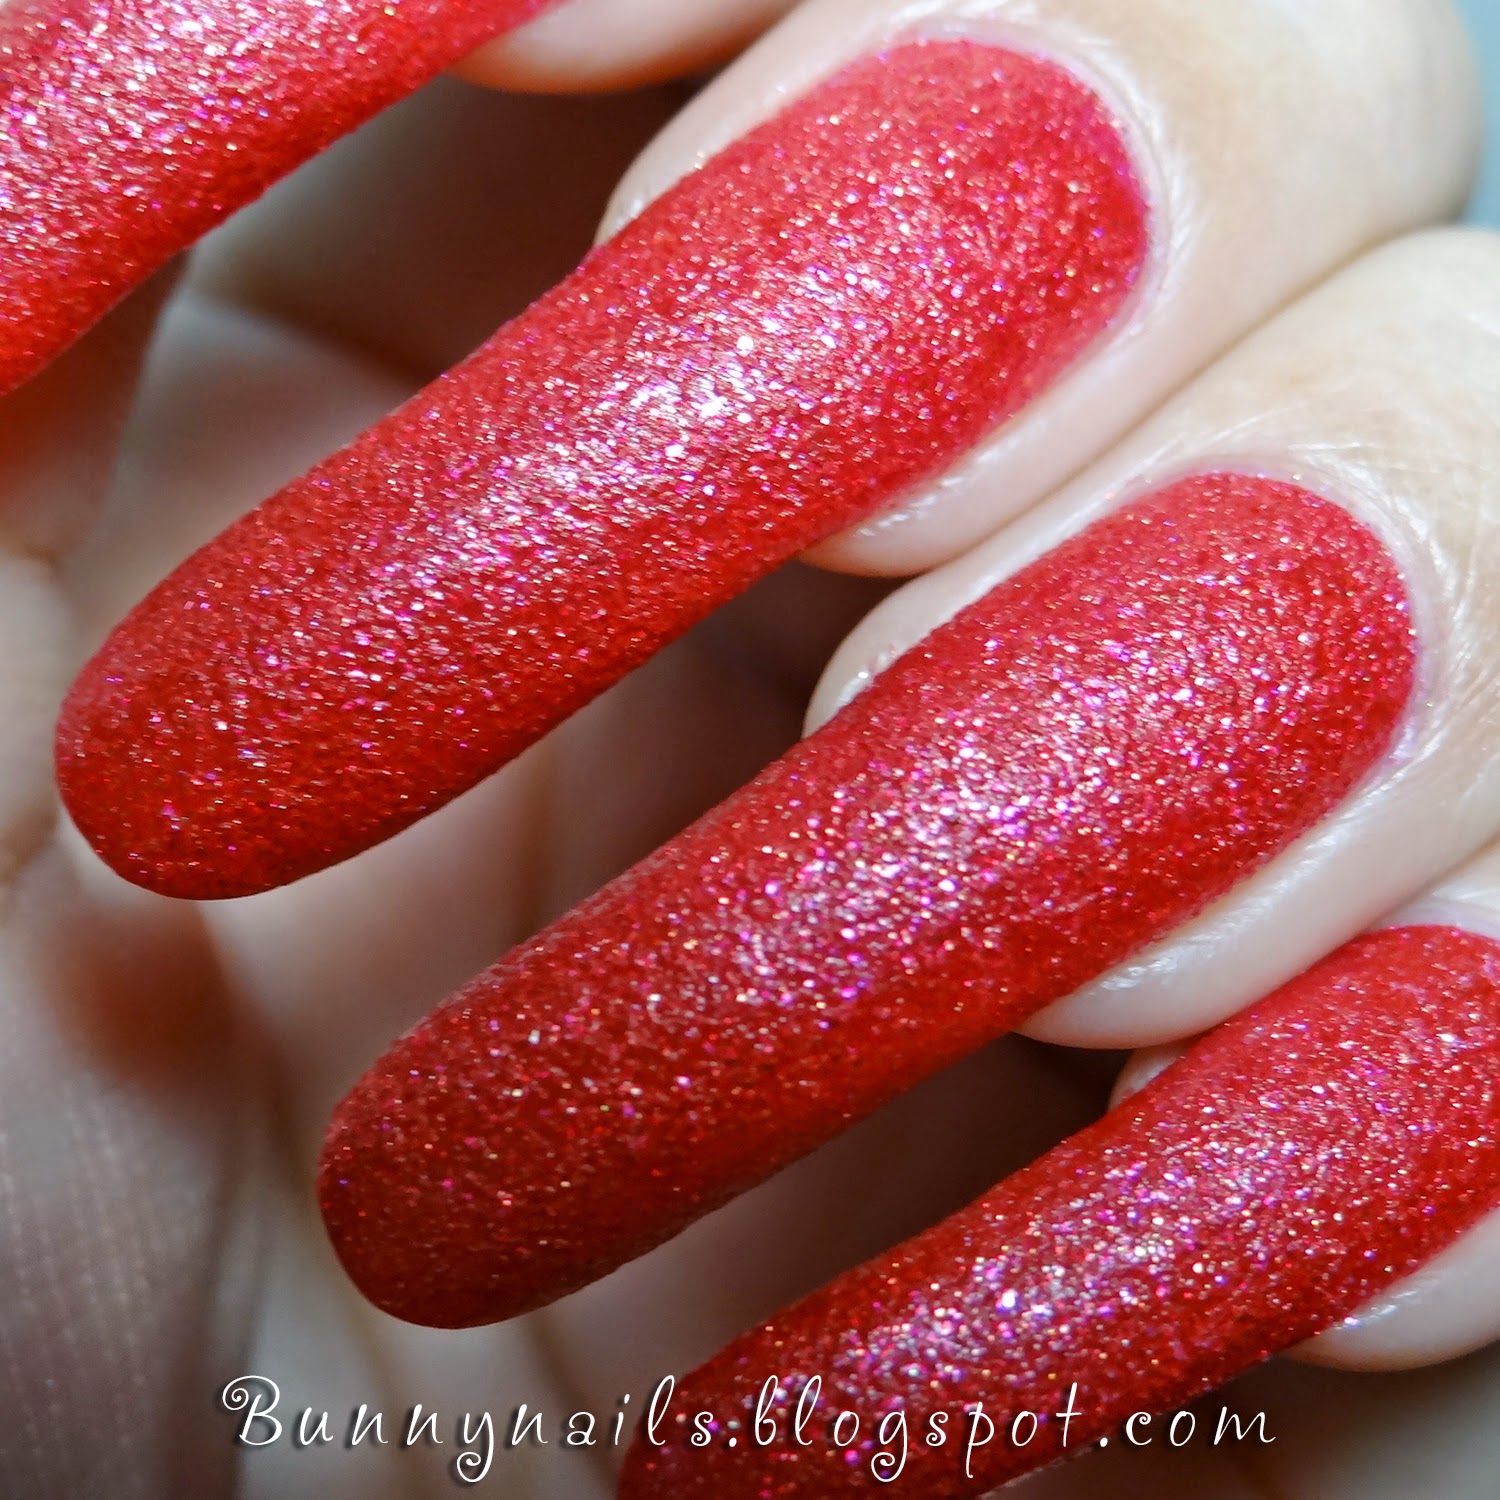
Here, I'm wearing OPI - Magazine cover mouse, a red textured nail polish with gold and pink shimmer.


This is a swatch of Nailnation 3000 - Cashmere topped with 24k gold flake topcoat The Midas Touch by Ninja Polish. I think it was a very nice combination.


This is it! I hope you liked this post.

♥♥Thank you for reading♥♥
Related Posts Plugin for WordPress, Blogger...