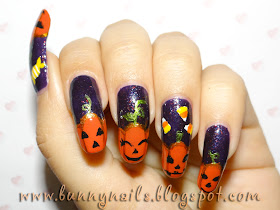
Today I decided to do a freehand nail art featuring a Halloween design. (Last year's Halloween nail art here)
This time, Halloween pumpkins were my inspiration.
Below you will see step by step pictures and instructions on how I did this nail art.
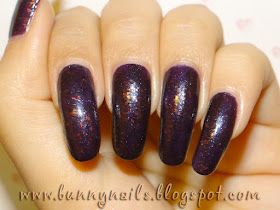
First, I painted my nails using a dark purple nail polish. I used Orly's Fowl Play.
Using an orange color nail polish (or acrylic paint), paint the tip of your nails making semicircular edges at the top of the design. The nail polish I used is Ulta - Sun of a Gun.
With a metallic or glittery nail polish paint the outline of the pumpkin. I used Kleancolor - Metallic Orange.
Now, paint the faces of the pumkins. The facial expressions are up to you ;)
Paint stems and leaves on the top of the pumpkins. I used Kleancolor - Metallic Green.
This step is optional: you can add any glitter, dots, etc... I painted some candies on the accent nails using to finish the design. I added wrapped candies on the thumb and candy corns on my ring finger nail.
Finished!
I hope you liked this nail art. You still have time do it yourself for this Halloween ;)
♥ ♥Thank you for reading♥ ♥


Yes!! I like it! It looks soooo cute! Very pretty pumpkins! :)
ReplyDeleteThank you! Hopefully I can do another nail art before Halloween ;)
DeleteThese are so cute!
ReplyDeleteI glad you liked it :)
Deletewow i love it!
ReplyDeleteThank you ♥
DeleteThose are so stinkin cute! No doubt.
ReplyDeleteThank you :)
DeleteWOW! Are amazing! Great on Halloween. I love it!
ReplyDeleteInvite:
music-the-world.blogspot.com
Thank you ;)
DeleteVery nice!
ReplyDeleteOH wow you're amazing!!! This is pretty cool and your nails look perfect :DD
ReplyDeleteWengie from www.wengie.com
Thank you for visiting my blog ♥
Delete